
Practicals (Part 2: Lighting Terms You Should Know)

Welcome back to my series on lighting terms that, in my opinion, are lesser known and important to know.
Most of these I didn’t learn until I was well into my food photography journey. That’s what happens when you largely learn your skills from the internet and trial and error. But it truly helps to know what they mean because they can bring new elements into your food photos.
Last week we talked falloff. This week: practical light.
Before I tell you what it is, look at this image.
Captured in 2016 on the grand opening night of a restaurant. A wild time to be capturing a restaurant, for sure!
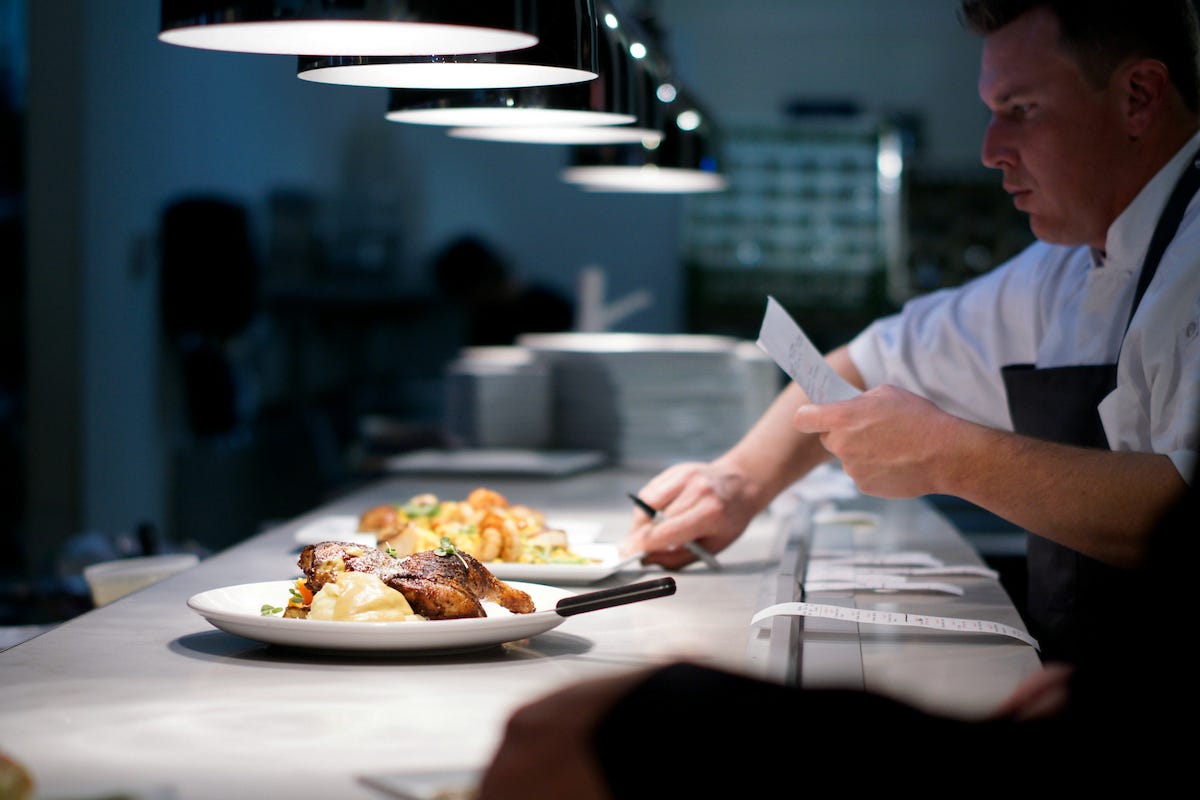
Side note: For anyone who’s familiar with my more elaborate studio setup today, you might appreciate knowing that this gem of a shot was captured in auto mode on a used Sony a6000 with a 55mm f1.8 lens, shot in JPG.
Proof that you don’t need to do all the fancy things to get awesome shots.
But back to practical light.
Why do I love this image? Certainly the composition is effective with the chef, his expression, the tickets, the colors, leading lines, and the feeling of being at the pass in a busy restaurant opening night. But a big part of the magic is the mood created by the overhead heat lamps, creating a spot light on the food and giving it a feeling of atmosphere.
That’s practical light!
To further “illuminate” the concept 😜, a practical light is a light source that’s visible in the frame and reads as the apparent source of illumination for the scene. The term comes from film and theater, where cinematographers have been using practicals for a century to make scenes feel like real places.
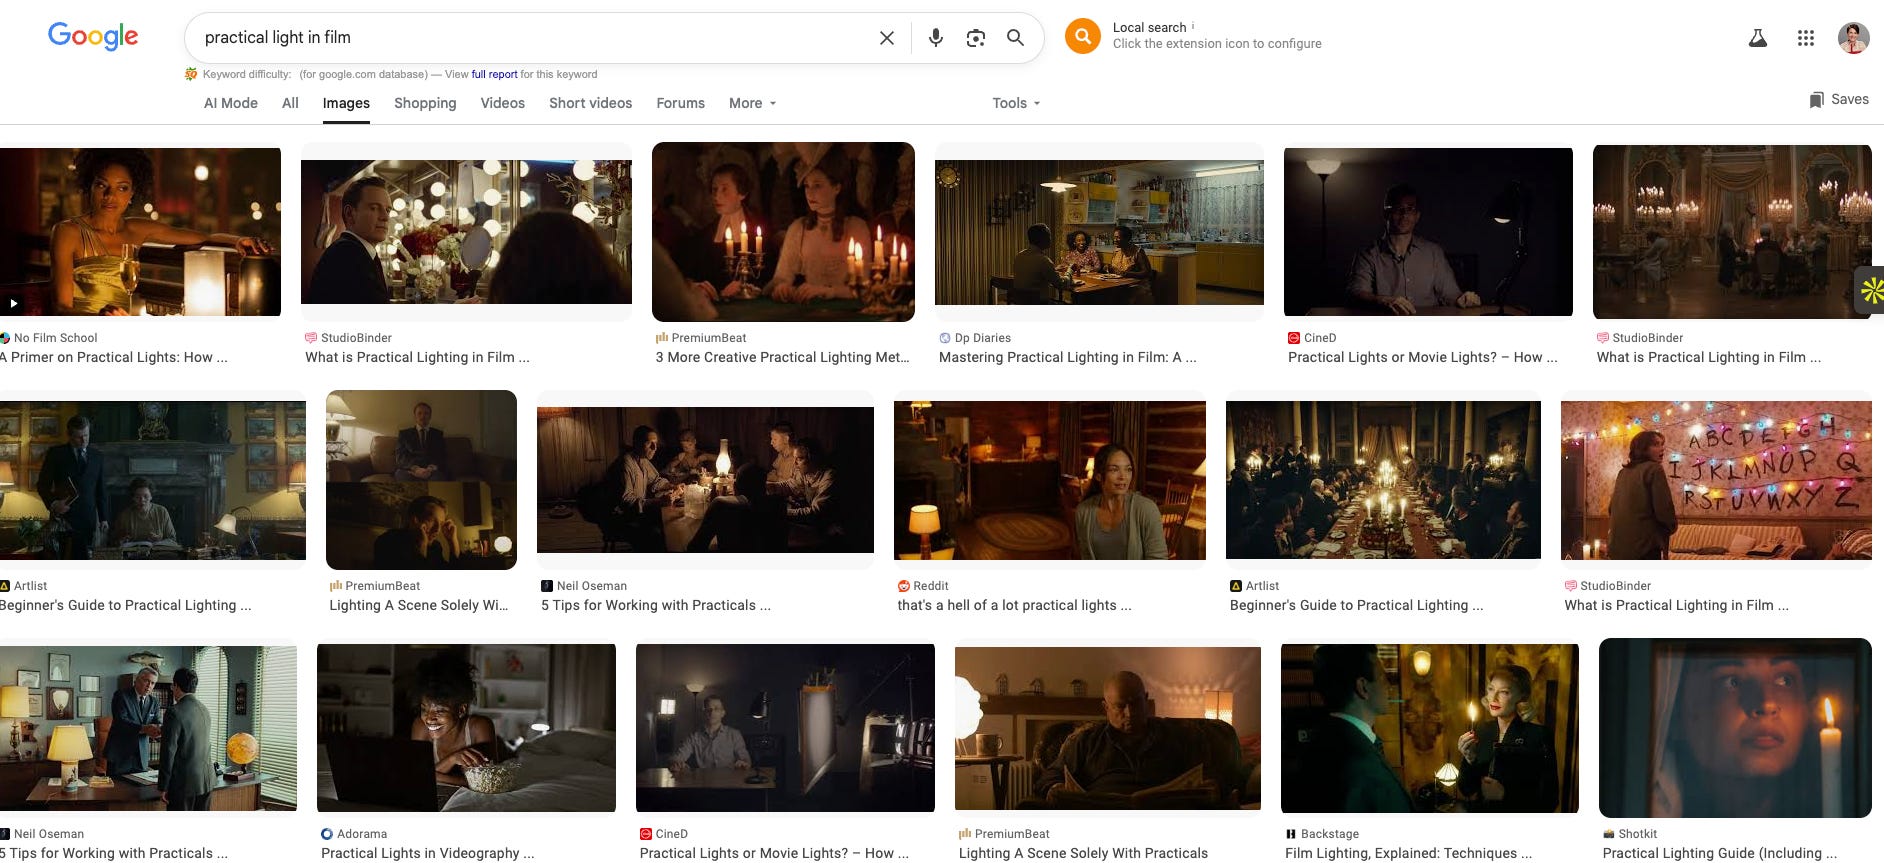
Just google “practical light in film” and you’ll instantly get an idea of the concept.
A candle on the table. A pendant lamp overhead. A window in the background. A fireplace in the corner. A sparkler in the frame. A lit stove burner. String lights, neon signs, the screen of a laptop. Anything that lives inside the picture and reads as a source of light is a practical.
Why use practicals?
When there’s no visible light source in a scene, the viewer’s brain is subconsciously asking where the light is coming from. Add a practical (even if you’re using studio lights or a large window to light the scene) and things suddenly feel more real because of how we interact with light in the real world.
This is how you turn a photograph of food into a scene with a sense of place. A kitchen, a restaurant, a holiday table, a New Year’s Eve celebration. If you’ve ever looked at your food photos and thought that perhaps they lacked a sense of atmosphere or grounding, perhaps this is your cue to experiment with practicals.
Practicals are Liars
But, the big secret? Most of the time in photography and film, the practical lights aren’t truly the key light. They’re generally not powerful enough to bring light to a whole scene effectively.
Check out this candlelit scene.

Yep, those are real candles and I love the warm glow they created. But run the math. Two small candles cannot expose this entire table, hold the texture on the persimmons across the scene, and put that golden sheen on the hens. They’re not that bright.
There’s a strobe positioned outside the frame in the upper left creating illumination across the scene, pointed specifically at the hero of the shot. It’s warmed up to match what real candlelight would look like. But, your brain clocks the candles as a source of light, bringing in a feeling of intimacy.
Here’s another one.

That sparkler in the upper left is real. What you don’t see is me erratically waving it around to get it in just the right spot in the frame.
But, then also check out where the hot highlights fall on the left side of the macarons. I would define this as an edge light, giving the subject a sense of depth.
Now, as you might have assumed, the sparkler isn’t producing this edge light. There’s a strobe firing from the left creating that light (with a pink gel on it, because why not). But because the edge light is on the same side as the bright sparkler, the brain sees that illumination on the subject as related to the sparkler, even though it’s not really. This helps that edge light feel less random and more as an integrated part of the larger action-filled scene.
To reverse engineer this? Put a practical in the frame to set the apparent source, then position your photo light to match what that source would be doing.
A Practicals Stack
But you don’t have to stop at one! Here’s another example.

Christmas tree lights on the left, fireplace glow on the right. Neither one is actually lighting the cake or the overall space. The cake has its own dedicated key light keeping the white frosting a brilliant color.
There’s also a light being bounced off the ceiling to illuminate the overall space, as you can see in this behind the scenes photo.
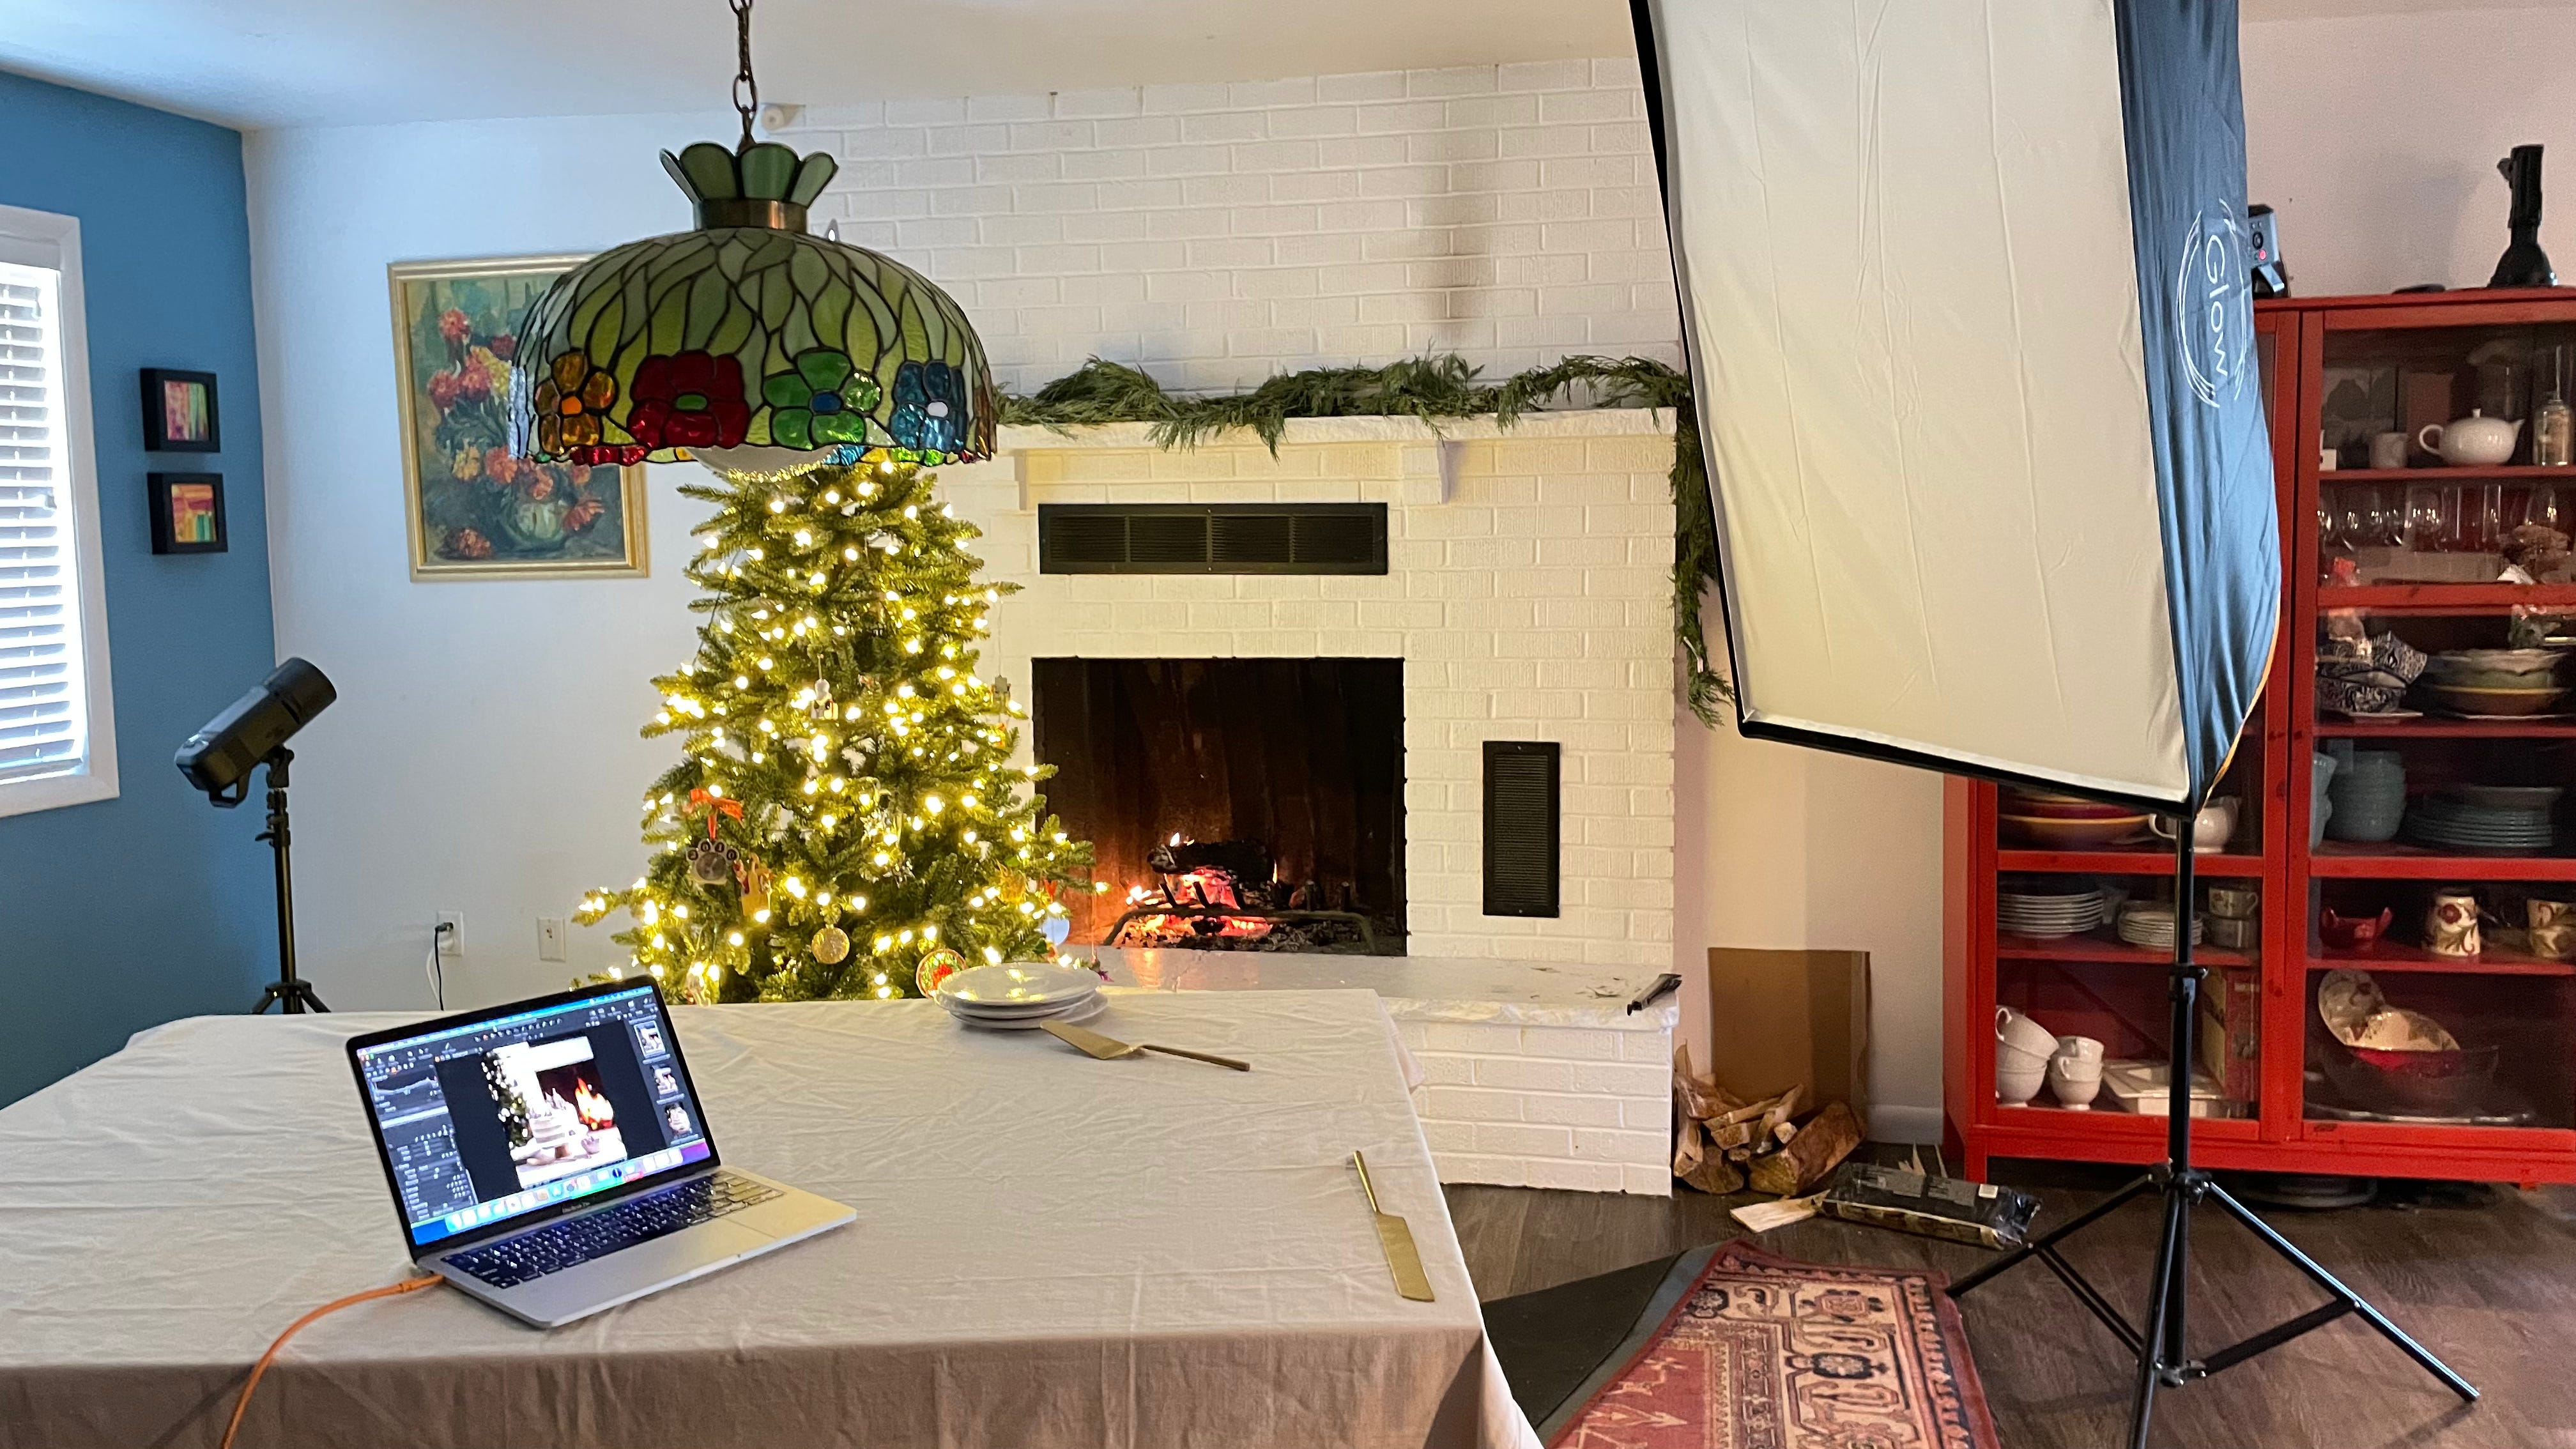
But the lights of the tree and the fire are telling a story and adding warmth. Without them, it’s just a cold peppermint cake on a counter. With them, you’re at someone’s house (my living room actually), feeling cozy during the holiday season.
Practicing with Practicals
It’s your turn! Set up your scene the way you normally would. Then before you start shooting, look at the frame and ask yourself if there’s a visible source of light in the picture. Could there be? Sometimes the answer is no and that’s fine, not every shot calls for a practical. But sometimes adding a candle, a lamp, a window, or just composing to include something that lights up changes the entire feeling of the photo.
Take the shot without the practical. Then add one and take it again. Compare the two. See what happens.
Till next week!